Thursday, 11 May 2023

Major Project - "Gold": Hero Retopology and Unwrap

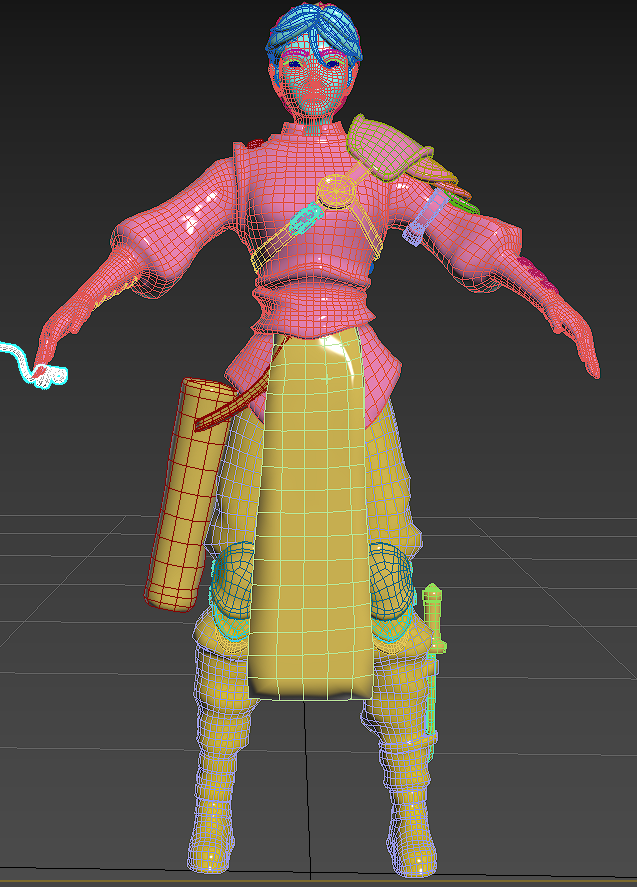
In terms of retopology, I will keep it brief as there isn't much to say, just a list of technical requirements that need to be ticked off in order for the character to be able to be animated. 

I started with the face. I split the head and neck from the rest of the body and capped the neck underneath the armour in order to make for and easier and cleaner retop. I made sure that the deformation loops around the eyes and mouth were properly placed. In terms of workflow, I usually like to get the retop done, and only after everything is in place, clean it properly. Of course, I work as cleanly as possible from the get go, but I don't concentrate specifically on that, but rather on retopping as fast as I can to save time and see the bigger picture. 

I kept the eyebrows separate, as I've seen people usually do for stylized characters. Moreover, if I had tried to retop them into the face, I think it would have ruined the cleanness of the deformation loops around the eyes. So I prefered to keep them separated.  


I added deformation loops around the shoulders, only until where the armour starts, as the metal won't need to deform. I didn't add any on the elbows, as the sleeves are puffed anyway. I did my best to follow the edges and flow of the character's parts (chestplate, the cloth around the waist, shirt, forearms etc.) in order to make it easier for myself to unwrap them. 

For the smallest pieces I used Zremesher to get a base for the retop, then cleaned it and reduced the unnecessary topology.


I had initially added only a few loops onto the cloth hanging down from her waist, but I added more after getting feedback and realizing that in order for the cloth to be animated it would need more topology to move smoothly. 

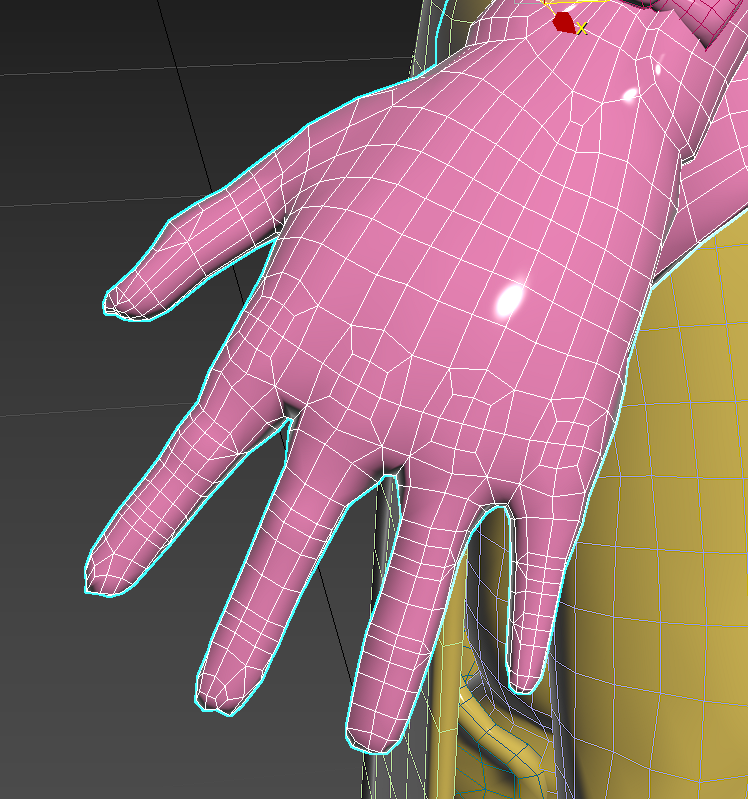
For the hand retopology, I started with the fingers, keeping the loops going, then worked my way to the wrist. 

For the bow, I used the block-out I first made for the main shape, then Zremeshed the vines and flowers and cleaned the Zremeshed mesh.


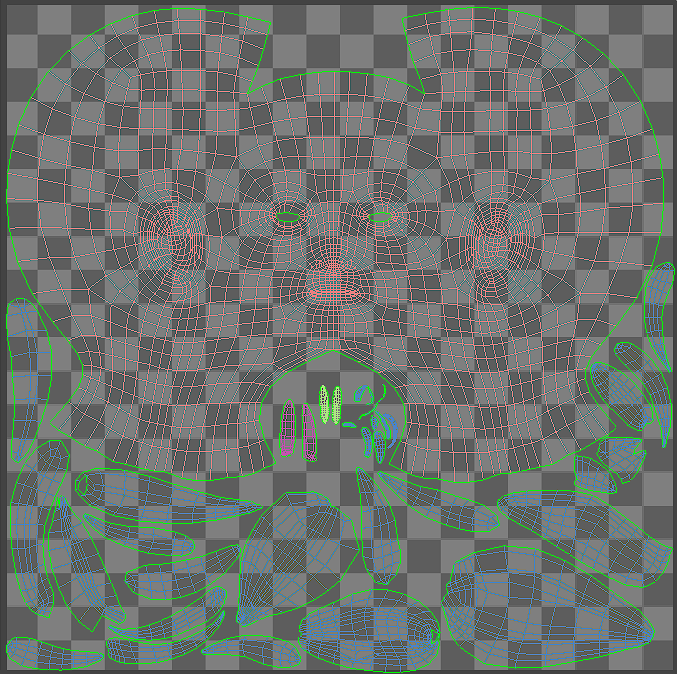
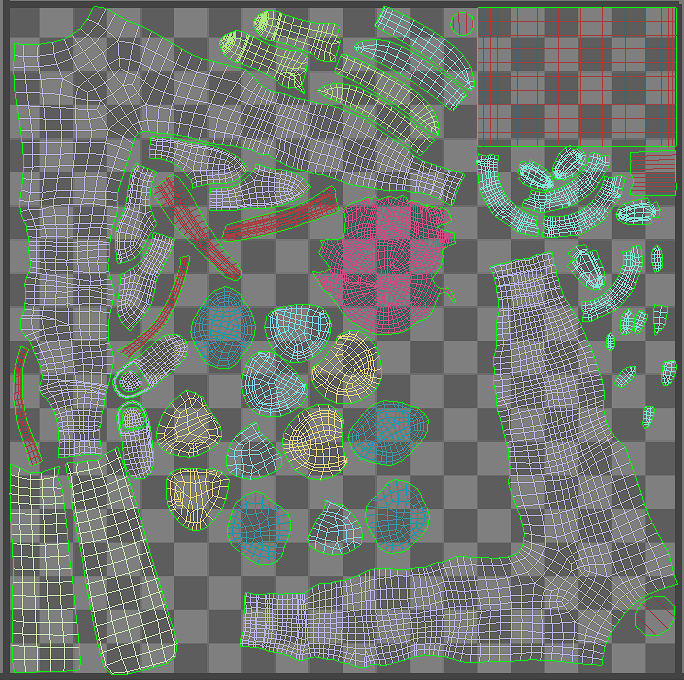
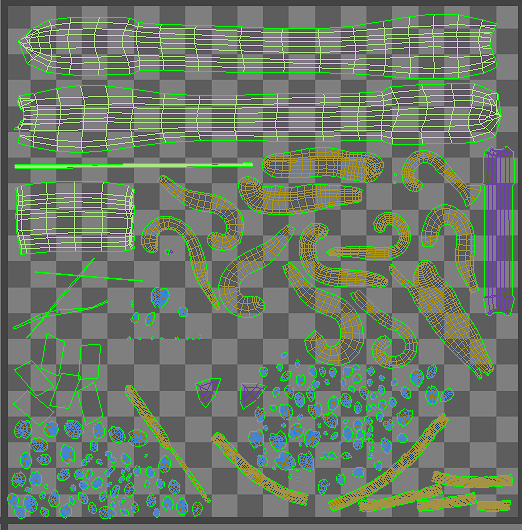
When unwrapping, I did my best to straighten out as many of  the UVs as possible and pack them neatly, since there were a lot of elements to the character. I didn't want to use more than 3 UVW sheets (excluding the eyeballs) for the main body and 1 for the bow and arrow.




Major Project - "Gold": Sculpting The Hero

As I started to sculpt the hero, I used a stylized female body base I had sculpted during summer and modified it in order to fit the body type I wanted for this character. I then sculpted her face, starting from very simple, messy shapes, then defining the planes and sharpening the edges in order to give it that stylized Overwatch look I was going for. 


The challenge in sculpting a female face in this style, in my opinion, is knowing how much to sharpen the edges and planes of the face while still keeping the roundness and softness usually seen in female faces. For the hero, I was going for a boyish look, while still making sure the face would read as female to the viewers, so I had to keep a very delicate balance between the sharp and round features.


I then made her clothes in Marvelous Designer before proceeding with more details. For stylized characters, I usually don't bother with a clean Marvelous mesh, as usually dynamesh and zremesh it in order to simplify the shapes. Then I push and pull the shapes using the move brush and then sculpt the folds using mainly Orb Cracks.


I then added the hair, chest plate, shoulder armour and knee pads. I used ZModeler in order to obtain clean shapes as the base, then sculpted in details. I also added some eyebrows on her face and defined it a bit better. 

I also realized that there was no way of putting the armour on, realistically speaking, as it was one big piece of metal encasing her torso. So I looked a bit into different ways armours used to be built and split the chest plate in two, then added buckles on the shoulders and sides. I considered just having the armour open at the back, with straps keeping it in place, but it felt like the plate was cutting off too suddenly on the sides and there were also too many straps crossing each other on her back.


I also cleaned up the shapes of the hair strands and added some detail onto the braid going around her head. 

"Arcane" was one of my other references for the style, which can be noticed mostly in the shape of the eyes and the way the top of the nose is flattened. 

One thing I noticed after being given feedback is how the "Arcane" character's bottom lid has a very defined edge and thickness, which catches the light nicely, so I used inverted Dam Standard to add it and define my character's eyes. I also used it on the edges of the lips, specifically the cupid's bow area.


I duplicated the chestplate and slightly made the second one smaller, then used a mask I drew in Photoshop in order to get a clean design of the golden apple tree in the original fairytale on her armour. I also added buckles on the straps so there would be a logical way for her to take the armour off and put it on. 


I added stitches on her pants and gloves to give it a more stylized, cartoony look, as well as add some more details to it. 


I drew some more masks and used them to add patterns on the leather braces on her forearms. 


Finally, I added the quiver and used similar designs as the ones on the arm braces, to keep the flow of the piece consistent. I then added some wear and tear marks on the armour and leather. 


I then sculpted the bow, adding vines and apple flower designs on it to make it unique and to add more references to the original story. The bow is going to be made of metal, so I added some leather wrapped around the handle in order for the bow to be held without slipping or digging into the archer's hand. 


Here are some photos of the finished sculpt and some detail highlights:


Sunday, 15 January 2023

Major Project - "Gold"

For my FMP I've decided all my characters will be part of the same universe, the same story, inspired by Romanian folklore and fairy tales. Through this, I want to show that I can give my characters diverse looks and personality, while still showing them belonging to the same world and concept. 

A while back, I started putting together my own folklore inspired story as a past time. I drew inspiration from the Romanian fairytale "Praslea cel voinic si merele de aur" (Praslea the brave and the golden apples) to make my own version of it and some of the sketches of the characters were part of my portfolio for applying to university. I think it is only right my final project consist of the characters that got me into uni and that developed so much during these years, alongside with me and my art skills. 

Through this project I want to demonstrate the development of my art style, clean and expressive sculpting that portrays the characters' personalities and shows an adequate amount of detail and the ability to produce characters belonging to the same universe yet still possessing their own charm, as well as diversity in age, gender and body shape, while also conveying their role in the story (protagonits, antagonist, helpers etc.) through shape language, colour and detail. 

Moving on to the characters:

1. The protagonist - The Hero 

In the original story, the protagonist was the youngest son of a king. He uses a bow to catch the thief stealing the king's golden apple (yes, they were real actual gold), so I thought my character should be an archer. I also thought, why not change the protagonist to be a girl, just for the fun of it, and just to see how the image of the character would change in my mind's eye. 


Since she is an archer, she would have to wear lighter armour (mostly made of leather, with a metal chest plate at most, to protect the vital organs). I want to incorporate elements of traditional Romanian clothes into her attire as well. Taking into consideration practical details like having to fight and technical details like the time I have for each character, I decided to give her a braided hairstyle, with the braids secured around her head like a crown, in order to be able to sculpt and retop that more cleanly. I quite like her silhouette and the shapes in her design, as they suggest the idea of a hero. 


2. The Helper - St. Friday

In every story, there is one character, old and wise, that advises and teaches the protagonist. In some Romanian fairytales, the prince is helped by his talking flying horse, but in others, one of the personifications of the weekdays shows up (mostly Wednesday, Friday or Sunday). I chose Friday, as she is mostly portrayed as either being a very gentle granny that helps the hero if they show empathy to her, or a wrathful deity that punishes people who work on Fridays (Friday is a holly day that is supposed to be for rest and prayer). I wanted to show this duality so I made her look like a petite yet spry grandma in traditional clothing. Yet, when you look back at what she is carrying in the pouches on her back and you take in the details, you begin to think she might not be who she pretends to be. Her expression is going to be frozen in a perpetual benevolent smile, so I will sculpt that in. 


3. The Antagonist - Zmeu

Described in some stories as an ogre, some as chimaera and some as a dragon humanoid, I chose to go with the last one as it was the most memorable version for me as a kid. In the story I mentioned, he is the one stealing the golden apples and he and his two brothers kidnapped another king's daughters, that the hero saves, marrying the youngest one. I want Zmeu to have a bulky body type, similar to the orcs in World of Warcraft, but slightly more lean, since he is, at the end of the day, similar to a lizard. When making the concept, I made him too human-like at first, at least the body, so I tried to push his ribcage out and up and give a more serpentine shape to his posture. Back in the day, most of the clothes worn by royalty (and since he lives in a palace he is, somewhat, royalty) were influenced by outside cultures that occupied Romania in the past, like Turkey, Hungary, Byzant, so I'm going to have him wear something similar to that, which would make him look alien to this world, enforcing the point that he is in fact, intruding in it. 


Monday, 9 January 2023

Character Brief: The Captain - Texturing and Final Steps

When texturing, I tried to keep a clean, stylized look, still adding enough details to give the character dimension and story, but not as much as a realistic style piece would have. I drew inspiration from different stylized works, mainly Overwatch and some Fortnite characters. 

For the skin, I started with a base colour, added some ambient occlusion using two fill layers with a black mask and a mask editor (one for wider, softer shadows and one for the finer, stronger shadows), then some edge highlights (especially on the nose and edge of the eye) in the same way. I lowered the layer opacity and added a slight blur so it wouldn't look unnatural. I used a pink layer with a black mask for the more vascularized areas of the face (mainly the cheeks and a tiny bit on the nose). I added some around the eyes as well, since I wanted to achieve the "haven't slept for days" look. With a purple layer and a blur effect I painted over the jaw and chin area, as well as under the eyes for some eyebags. I painted some more shadows around the eye to make it pop more, but not too much as I didn't want it to look like make-up. With a layer with only roughness turned on, I painted over the shinier areas of the face, where there is more sebum production and hence, makes the skin a bit glossier: nose, cheeks and forehead (it's not visible here though). Of course, on a stylized character I exaggerated it a bit and also added some on the lips. 

For the metal on the helmet, I kept things simple: I wanted it to have that painted kind of look, so I used a grunge procedural with a blur slope to achieve it. I added some roughness using procedurals and colour variation using a layer with a white mask and a light generator. I added ambient occlusion and edge highlights using mask editors, as well as some rust. The copper was made in the same way, just different colour. 


For the clothes, I kept the pants simple, adding ambient occlusion and some edge highlights, as well as some colour variation using a light generator on a fill layer with a white mask, something I've noticed in a lot of stylized characters. For the clothes I did something similar, but used one of the smart materials in substance painter as base and modified it to fit my vision. For the metal bits I used the same metal from the helmet and for the leather I used a cell procedural on a height layer in order to get the leather texture. 


I used Mixamo to pose my character, though I had to edit some of the skinning manually, as some pieces of the metal leg were deforming unnaturally. I then brought everything into Unreal, made the emissive bits and lighted the scene. I also made the eyeball texture in Substance Designer and implemented it using parallax occlusion mapping. I kept it simple, to fit the stylized character. 


I am really happy with how this turned out. My favourite parts are the face, the metal leg and the shoe details. 

This project was a challenge in some ways, but it thought me a lot of things that I will be able to use for my final project. 


Character Brief: The Captain - Retopology, Unwrapping and Baking

First, I tried retopping the entire head of the character altogether, including all the pieces of the helmet, but ended up retopping the front piece and the one going around the back of the head separately, since the incide was difficult to retop because of spaces I left between the pieces and the head, which is something I will keep in mind for the future. I could have probably managed to retop them, but it would have taken way more time than I could afford and so, I needed to make a decision. So I ended up retopping them separetely. 

I kept the deformation loops on the face as even as possible and used the cut tool in order to retop it altogether with the eyepatch, to avoid any holes in the mesh in the scenario the mesh would be animated. 


I first retopped everything, then used the Conform and Conform Relax tools in order to clean and even out everything.

For the bullets, the wires, gauntlets and the small bits of the shoe I used Zremesher and then Conformed them to the high poly. 


For the leg, I prefer doing most of it manually, as it is a point of interest and I wanted it to be perfect. Plus, since there are so many small pieces, painting over baking errors would waste too much time.


For the shoe, I retopped the big part of it myself (the shoe itself) and used the Zremesher method for the laces and circle bits in order to save some time.


I've seen plenty of stylized characters with no deformation loops in the hands, but I decided it was a safer bet using them and I wanted to practice retopping them properly, so I added them in the end. 


I then unwrapped the mesh on four UV sheets: one for the clothes, the shoe and the glove, one for the leather and metal bits and one for the head, as well as one for the eyeball. I straightened the UVs as much as possible without warping the textures. 


After baking, I only got errors on the small bits and pieces like the bullets and the shoelaces, which I painted over in Photoshop, after finishing the texturing process, in case I had to bake some of the maps again. 

I also had to go back and model a bandage around the leg in Zbrush, since the shape of the organic leg going into the mechanical one looked a bit unnatural and I had to do something to fix it. It took a bit longer, but I just conformed the mesh to the new high poly and had no further issues.


Major Project - "Gold": Texturing The Zmeu

 The texturing for Zmeu was the most tedious out of all of them. I used fill layers and masks as much as possible to give the scales some de...