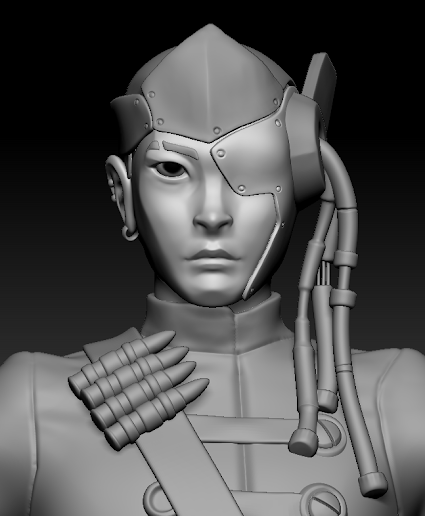
For the body base, I used a stylized female bpdy I had sculpted during the summer and modified it in order to make it male.
Thursday, 10 November 2022
Character Brief: The Captain - Sculpt
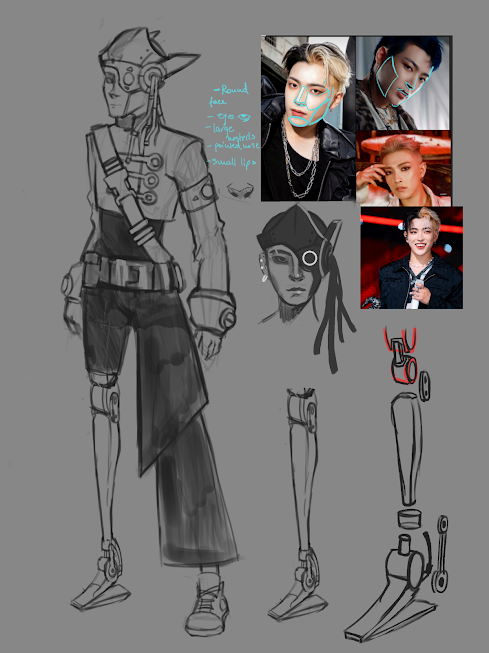
Character Brief: The Captain - Research and Concept
For the captain project brief, I decided I wasn't going for the basic 17th Century pirate Captain. The theme the brief offered was too open ended and gave too much room for interpretation and creativity to not take advantage of that.
Being used to and pasionate about history and fantasy, I had never really tried something sci-fi or cyberpunk themed, so I decided that this is a good time to experiment with it and hard surface details as well, since it can't be missing from a cyberpunk character, right? I also decided to make the character stylized, since I enjoy it and the last year character project didn't allow me to go all out with the sylization and show my own style.
I first did some general research to get an idea of what I wanted to do. I thought I would take something familiar - a pirate - and place it in a context where it would normally be odd: the future. How would the environment affect him and how would the concept of a pirate change in order to fit the new environment?
Legendary Jacket Item - Retop, Unwrap and Bake
While retopping the jacket, I did my best to create proper deformation loops for the shoulder and elbow area that would enable it to deform without breaking the shape. I did my best to keep the topology as even as possible. For details such as the chest piece and medals I used triangles in order to reduce topology. I believe that won't cause any problem with deformation in a game, as the chest piece is made of metal and wouldn't need to deform. It would be simply skinned to one single bone.
At first. I simply concentrated on getting the topology done, the cleaned it afterwards, straightening up the lines and inserting loops where the topolgy was too simple and uneven.
Looking back, the trim around the chest piece could have gone with less topology, but I was still far from the budget limit of 16000 tris with a final tri count of 13,512 for the military jacket.
I then unwrapped it, trying to keep the seams to a minimum and as hidden as possible. I straightened out the pieces as much as I could without causing distorsions in the unwrap, in order to better pack them together. I split the jacket into two UV sheets using material ID's: one for the jacket and one for the metal pieces and details.
For the biker jacket skin, I simply took the military jacket, took out the medals and modified the trim around the chest piece, as well as retopped the shoulder pads and the spikes. This way, I didn't have to redo the unwrap for meshes that are esentially almost the same. I then unwrapped the new details and added them on the UV sheet in the place of ones I took out.
The biker jacket ended up with a final tri count of 11,982.
I then prepared the jacket for baking by doing a last check for any kind of errors, checking the naming of the high and low polys and vertex painting the high polys in order to be able to generate colour IDs in Substance Painter.
I took the jacket into Substance Painter and baked it. The bake came out quite well, with just a couple of errors that I had to paint over manually in Photoshop. Overall I was really satisfied with how the bake came out.
Now the jackets are ready to be textured and finalised.
Wednesday, 9 November 2022
Legendary Jacket Item - Scultping
In order to achieve the base of the jacket, I decided to experiment with a new softwear: Marvelous Designer. I retopped and brought in my mannequin in order to make sure that the jacket fits it afterwards.
For the mannequin, I didn't dwell on deformation loops or avoiding triangles at any cost, as I knew it wouldn't move in the context of a hypothetical game, and half of it would be covered by the jacket anyway.
After bringing it into Marvelous Designer as an avatar, I had to set the bounding volumes and arrangement points as the program hadn't managed to do it on my mesh. Thankfully, it didn't take a long time, and the arrangement points were helpful later on, when arranging the material on the mannequin.
I used examples of military jacket patterns I had researched and added some of my own ideas too in order to get the shapes in my concept drawing. I first made a basic blowse pattern then started to shape it to my liking. I used "darts", triangular cuts made into the material in order to make the jacket more fitted and give it the stiff, triangular shape.
I welded together the pannels that made up the jacket using Weld Points and then regained some of the seam indents using ZModeler. On this occasion, I got the chance to practice ZModeler, which I had been reticent using until now.
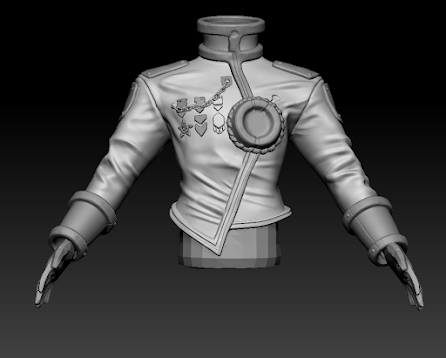
I then used the base to build up my jacket and made all the metal bits and details in Zbrush. Since they were simple shapes, it didn't take long, though I spent time making sure they look polished enough, as they are hard surface. As for surface details, I kept the damage low on the military jacket, since it's supposed to look clean and distinguished compared to the other one. I made the medals in 3ds Max and then polished them in Zbrush.
At first, there was no trim around the round piece on the chest of the jacket, but after getting some feedback, I decided to add it as a decorative piece in order to mask the sharp transition between the chest piece and the jacket surface. I also added more folds and inflated the edges of the panels a bit in order to give the impression of how the pieces on a real military jacket join together in the shoulder seam area.
For the biker jacket skin I simply modified the shape of the metallic shoulder pads in order to give them a sharper more aggressive look, and added spikes on top, as well as more surface wear and damage on the metal.
The rest of the details I will add in Substance Painter, in order to hopefully keep a non-destructive workflow and be able to change things on the way without spending too much time going back.
Major Project - "Gold": Texturing The Zmeu
The texturing for Zmeu was the most tedious out of all of them. I used fill layers and masks as much as possible to give the scales some de...

-
Texturing For texturing, I started with the biker jacket. I made the base for the leather texture using a height layer with a black mask to ...
-
The second week of the project I spent retopping the pumpkin in 3ds Max. There were a lot of elements to take care of, such as the vines and...
-
The retopping and unwrapping went smooth overall, but for some little setbacks. When making the deformation loops for the face I failed to a...


